Posts

Down to the Frame

Image
Here you can see here the previous owner cut off the ends of the rotten stringers and added the cross piece between both frames. The cross piece is removed.  With the floor completely removed, it was easy to see the work that needed to be done to the frame. Some rust removal for sure, some straightening of bent supports, and some welding type of repairs. I noticed when pulling Otis to the shop that the trailer appeared to “bounce” or rock forward and backward. Once I got to this stage of the teardown, I realized why. The frame had two serious stress cracks in the wimpy c-channel where they were welded/attached to the front L-channel cross member support. It’s apparent that the weight of the body puts a lot of stress in this area. I would eventually repair this with an extra plate of steel in these areas. I would also weld some brackets in the areas of the leafspring eye supports the width of the c-channel, in a sense, boxing in those 4 areas. There were also ...

Some more random rot photos of Otis

Image

Let the real demo begin!

Image
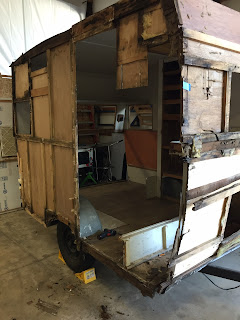
 After ripping out the kitchen counter assembly, I began tearing down sections of walls. It continues to be apparent that the structural integrity of Otis was gone long ago. With the entire passenger side and front dismantled, it was almost time for it all to come crashing down. The previous owner installed laminate flooring. It was pieced in pretty badly.  With all the walls torn down, the floor was next. The white plywood is in the rear where the last owner attempted to replace a rotten section. This photo also shows the cool galvanized fender wells removed. They were in great shape. 

A little roof action

Image
These two photos show how whimpy the roof is built for light weight reasons. One would never want to put their full body weight on it, that’s for sure. The upper picture shows the vent cut out. The trailer  came with a basic crank open non powered vent. I would replace it with a powered unit for nice air circulation. Both photos show how the high voltage line was simply just draped over the roof spars and the aluminum roof just set on top of it. I’m derstand it’s hard to rout wire through 3/4” thick material, but man, this just seams like a bad idea for many reasons. I would route the new wire inside the trailer cabinetry via conduit for a much more protected path and easier accessibility.

Entry Door

Image
 The door is in pretty good shape. I think it will clean up nicely. I would eventually figure out how to “beautify” the interior side. It’s wrapped in a textured aluminum painted a tan color that isn’t very nice looking.  I would replace the door screen with new aluminum screen and beading. The only minor defect with the door was the obvious damage left by someone trying to pry the door open. I look at that as history and will just let it be. The best part of the door is the original working door knob and lock. It’s a really nice piece of mechanical beauty that is unique in the way you twist the knob from the inside one direction in order to lock the door.

Bunk Window

Image
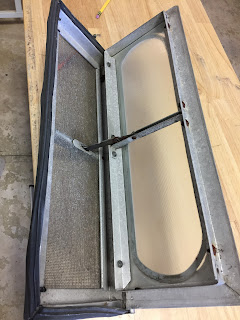
 I love the little bunk window! I look forward to rebuilding all the windows, but especially this little guy.   The screen looks in good shape.   It’s no surprise the seal is hard, shrunken and pulling away from the frame.

Water tank Fun

Image
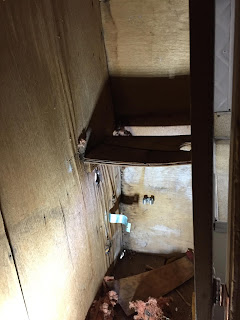
 This is the shelf that held the water tank within the closet area. I have not officially figured out the tank capacity, but I’m guessing it’s around 10 gallons. That’s a lot of weight on a single piece of 1/2” plywood! I will definetely beef this up in the rebuild. You can also see more water damage in the floor and wall corner area.  Here’s another picture but showing more of the upper portion of the area. Again, you can see in the upper corner, water entry, in its earlier stages. Here is the water tank. I will sanitize and re use it. It looks to be in good shape. I will obviously replace the copper and vinyl tubing. One of the problems I noticed with the installation of the tank on the shelf is that the tank does not have a flat bottom to sit on. Instead, it’s got extruded reinforcements that creat weird high spots that make the tank wobble around. I will remedy this later by building risers that will make the area around the reinforcements flush with the...