Posts

Dinette Action!

Image
 This is the passenger side of the dinette. The red grain plywood is some import stuff that looked awful. It was installed as an attempt to repair water damage on the rear of the trailer.   This shows the complete dinette. Kinda a mess.  This is the drivers side of the dinette.  The dinette converted into the bed. I had lots of ideas for this area. I wanted to possibly try and make the drivers side of the new bed wider. This would mean shortening the pantry a bit. I also don’t like the boards and stick supports needed for the bed. I wanted to construct something more efficient that simply slides in and out to support the seat cushions. 
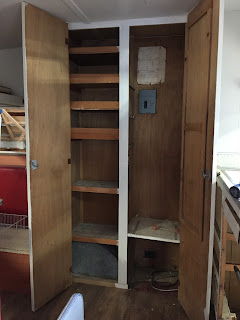
Pantry and kitchen cabinets

Image
 The pantry and closet. That electrical box has to go! My plan would be to install a converter power center somewhere in the closet or pantry area.  The two above counter storage areas. You can also see the ceiling sagging around the roof vent. In this picture, I have already removed the nasty broken fridge as well as the drawers. As I tear down things on the inside, my brain can’t stop thinking about the location of future wire and plumbing runs. 

Plumbing and Stove

Image
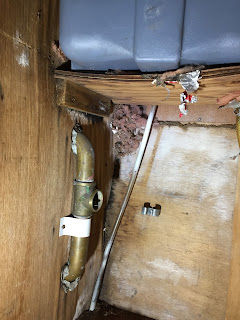
 This is a picture of the water tank and drain/vent assembly. Take note of the wimpy 1/2” thick plywood shelf that holds the 10 gallon tank. My goal was to reuse this old school brass assembly.  In this picture, I already removed the drain pipe portion that attaches to the sink. I love knowing it’s one year older than I am! Here is the sink underside. Again, my goal was to cleanup the brass drain pipe an reuse it.  The sink and faucet. The sink was pretty banged up, but the faucet looked rebuildable. I can’t wait to completely update the stove area. Although really cool in a vintage way, the wall areas  just look so random and busy. The range hood was very rusty. Nothing I couldn’t refinish easily, but I was thinking I would like to add a fan and filter (updated range hood) As for the stove/oven, I’m also thinking I would just update in someway. 

Rot, Rot, and more Rot, OH MY!

Image
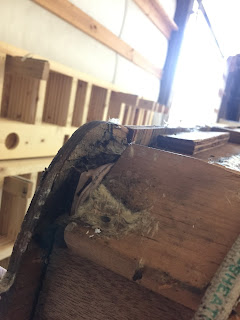
 Rear driver side roof corner  Passenger side damage. The tape was my attempt to hold together what was left for future measurements and/or template making in order to recreate new structure later. Again, this portion of structure was literally rotted away. Looking up at front driver’s side roof corner Front view. The bottom front portion was rotted away so much that the structure was sagging downwards. I see so much opportunity to bring Otis back to life with new materials!

The Rear End

Image
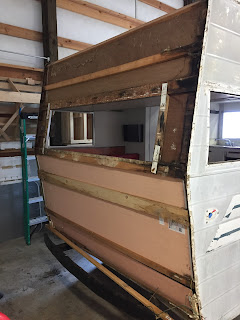
 The rear end was not without its issues. It looks like the dry rot got so bad that the previous owner attempted to replace the interior panels and some of the cross spars. Expanding foam works great to seal gaps between rotten wood and new panels......NOT! :^|  A closer look at the rear driver’s side. So much of the rotten wood was like fine powder.  I see lots of vintage trailers online that people update inside with a little paint and and some elbow grease. I understand most people may not have the resources I have to take the siding off to inspect the wood structure underneath, but man, I’m glad I did. Structurally, these trailers are built to be pretty durable as a whole. But when side walls and floors start deteriorating and separating , joints where they fasten together have rotted away, the overall strength of the trailer is truly compromised and the stresses of being towed down the road in this condition are just begging for something bad to hap...

The Teardown Continues

Image
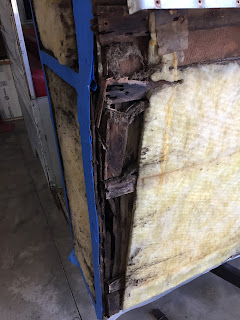
As you can see there was lots of dry rot, especially on the edges and corners. Nothing I wasn’t expecting. I love how the high voltage cable is stretched across the roof and over the front radius. Not exactly the best way to do it, in my opinion. I’ll definetely run it differently when the time comes. My other observation is of the wimpy fiberglass insulation. I understand there is only 3/4” of insulation depth, but in many places the insulation was so thin you could easily see through it. I will be using rigid insulation in place of the fiberglass. It’s light weight and will add some substance to the entire entire trailer.

The Teardown

Image
Door, bunk window, and door removed There was nothing too noticeable after removing all of the windows and the door. A lot of my excitement during the teardown process was too see how well (or not) the Lil Loafer was built. As a teardrop manufacturer, I feel I built very quality trailers using both RV and furniture construction techniques. This experience would definitely play a part in the reconstruction method of Otis later on.  I didn’t have real high expectations for build quality of the Lil Loafer, but it was still being pulled down the road 54 years later. I would soon find out that Aristocrat, in my opinion, was no different than today’s RV manufactures. Things were pretty crooked, few “square” openings, millions of staples (that do very little over time to actually hold things together) and poor plumbing, electrical, and gas systems. But, with that said, again, Otis was still hanging around all these years later and the construction flaws are the reasons they a...